Showing posts with label calendar. Show all posts

Friday, November 1, 2013

Our "New" Calendar

I'm pretty cheap. I hate the thought of buying a calendar each year. Last year we actually got one for free, a nice big one that was suppose to be a desk calendar that I punched holes into and hung on our door.

collaborative art 13Mar13 (3)
The calendar is in the upper right corner of the photo.

Normally what I do with the calendar pages once the month is over is I give it to Emma for paper to color on. 

Not sure when or why, but eventually it dawned on me; the back of the pages are the perfect size for next years calendar!

So, this is how we did our latest batch (because I didn't take photos of the first batch). 

Materials Needed
Upcycled Calander (3)
Old calendar pages that are blank on the back (not in the photo)
Writing implements (pencil, pen, markers, colored pencils, etc)
Ruler (if you want straight lines)
Tape
Stencils
Cheat sheet with the months of the year and days of the week

Step 1
Use a bright window to trace the squares from the original side onto the back side of the paper. 
Upcycled Calander (1)
You can tape the page to the window if it's easier. We used pencil so that we didn't Sharpie the window.

Upcycled Calander (2)
Ready for art work!

Step 2.
Cover the page with stencils, doodles, and whatever else you want. 
Upcycled Calander (5)

Step 3. 
Add dates, go over the outline of the calendar with marker (if you want) and presto-chango!

Upcycled Calander (6)
We are now ready for December. 

A quick note: On our last batch of calendar remakes we did, we covered the pages with paint before adding the lines and dates. While they look cool, it was hard to see the dates or anything else we may have written on the calendar (such as appointments). This time around we are going minimal and so far we like it better. 

What do you do with past years calendars?

Sunday, August 28, 2011

An Awesome Weekend and A Workshop

To those of you that I met this weekend at the Nevada Lincoln Highway days, thank you for making this weekend super awesome!

I had so much fun talking to all the people that stopped by my booth. I didn't sell much, but I did get a lot of people interested in classes and workshops! I am so excited to get started teaching others to be resourceful and creative. That being said, here is a link to more specific information about my  upcoming Junk Journal workshop. For classes that are scheduled in the future, visit my calendar.

Thanks again for making my weekend rock and I look forward to meeting you again in one of my creative classes!

Tuesday, August 2, 2011

August's Altered Art Journal- Calendar

To start of the new month I started a new altered journal. I love how everything in life is a learning process.

First lesson learned from the new journal?

Make sure the altered journal isn't bigger than my scanner :)

Here are my calendar pages:


The calendar pages are on the back of the front cover and the very first page. I ripped up a few pages from an old dictionary and mod podged them in. I went over that with some green soft pastels with a touch of blue. Over that I made a bunch of swirls with different colored gel pens (gelly roll, soufle, glaze). I also used some LePlume markers and a few sharpies. All in shades of blue and green with a touch of white. I went over it all with mod podge and layed out my inchies for the title and days of the month. I used Martha Stewarts Opaqu marker set for the month and year. I traced the letters and numbers with a silver sharpie.

And I decided to do weekly pages as well.


The weeks are not to fancy. I just used some found lined papers- each week has the same patterns of paper, but I have arranged them different for each week. I plan to doodle to fill in all the blank space. 

That is all I have so far but I look forward to filling up this months altered journal!

Saturday, July 9, 2011

More Altered Journal Pages

I discovered that using my scanner produces better shots of my altered journal pages. Well, except for the squiggly line down the center of some. 

Black and White Inchies

Weird randomness 

Decided to make a calendar in the front of the book. 

Currently trying to write a poem to go with this page. I may just end up writing a story. 

My first collage person. I want those tights!

Rearranging the family/craft/weight room

This page was fun. Tissue paper, flowers from Dora napkins and a horse from brochure.

Pictures from the actually readers digest I am currently mutilating. 

Weird randomness

Emma's art! She loves to draw giraffes. She is pretty critical of her horse drawings so there are not as many. 

2nd collaged person and picture from the book. 

My goal is to try and create a new page every day, but it may not happen. At the end of July I plan to use up whatever pages are left in the back of the book to make a little storage nook (in a book!). Then I will start a new altered journal in August (unless something shiny catches my eye...).

Monday, April 12, 2010

My First Attempt At A Tutorial - Stitched Books

I am not very good at giving directions. Probably because I am not very good at following directions :)

But, I decided to give it a try.

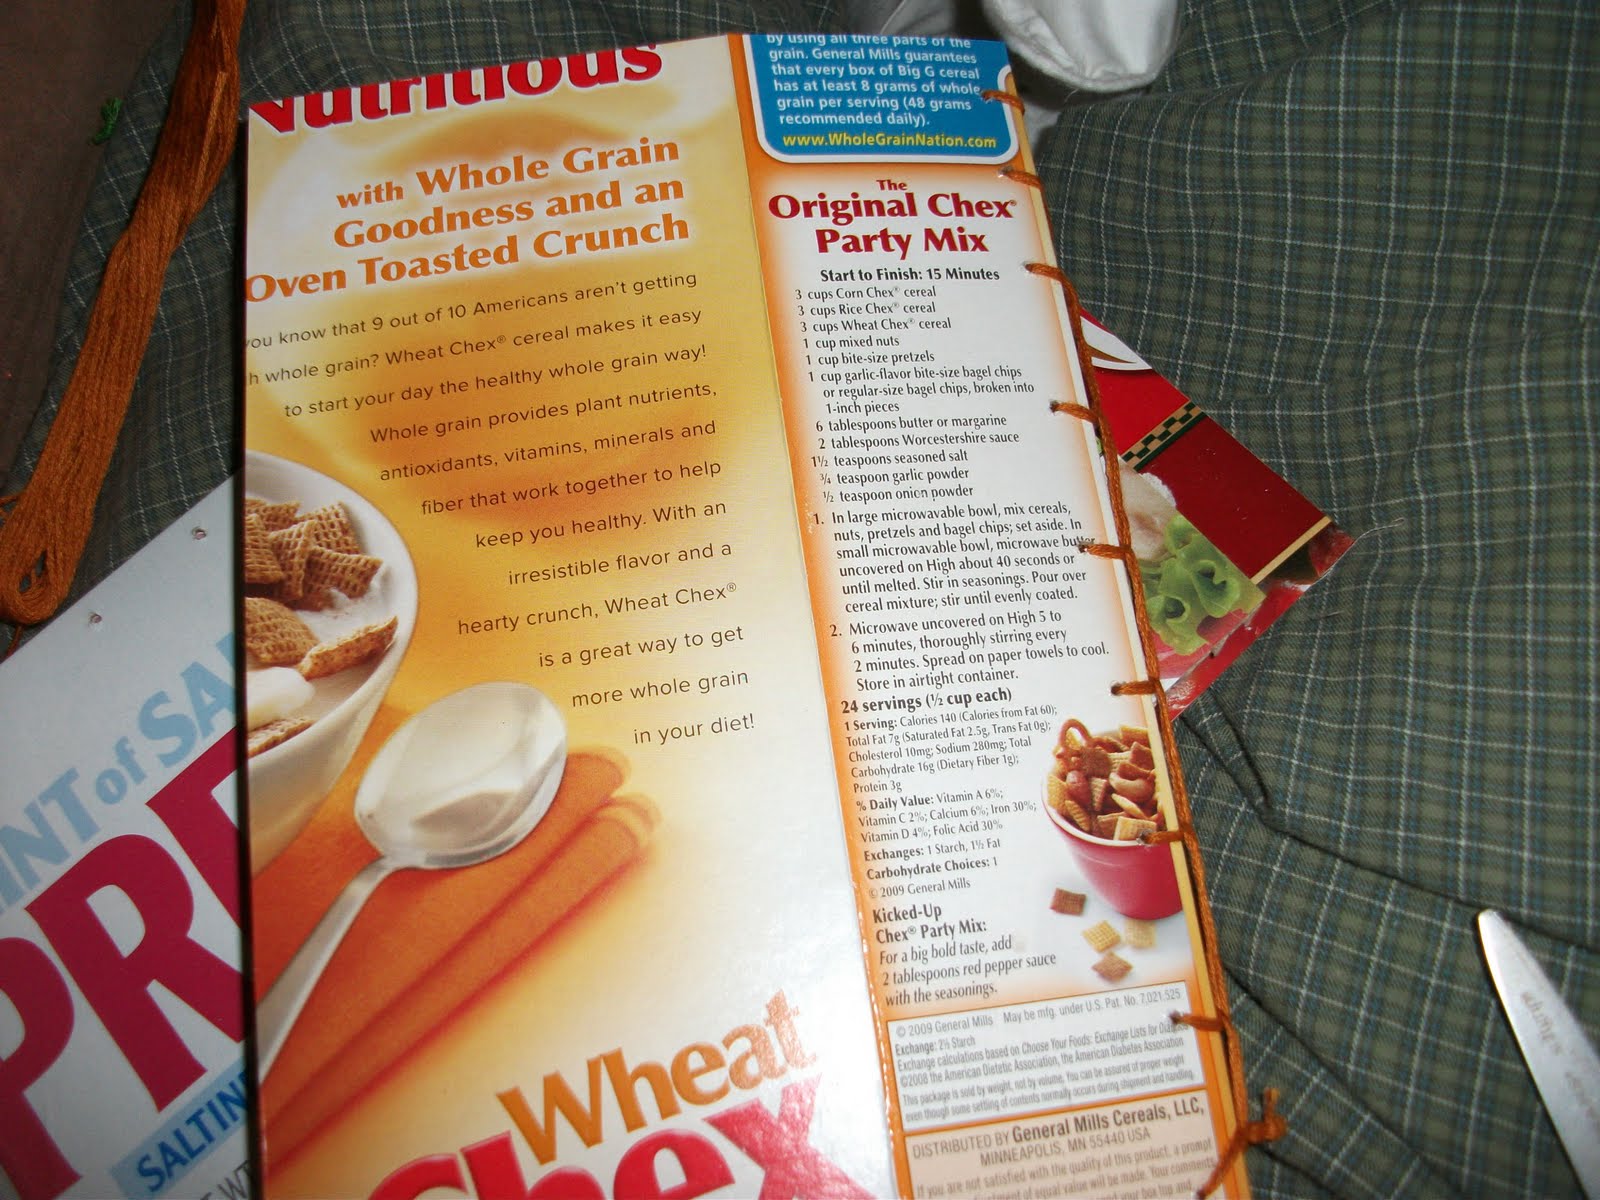
I was taking some pages (ones printed on one side) out of a college workbook that I never ended up using and decided to use the books original covers to make a new handmade book.

After making these two,

I decided to try creating a 'To Do List' in Excel. I liked the test pages I printed, so I also made up some blank monthly calendars. I decided to print up and make the calendars into books first.

As I was cutting up some cereal boxes to use as the covers, I realized this would make an easy (for me) tutorial.

So, here goes.

Materials needed:
-recycled paper (can be anything; paper printed on one side, wrapping paper, junk mail, envelopes, etc.)
-cardboard boxes (cereal, granola bars, pizza boxes, etc.)
-embroidery floss (could also use twine, yarn, heavy string, ribbon, etc)
-scissors or rotary cutter
-straight edge
-drill with a small drill bit (or you could use a hole punch, it just takes more work)
-something to drill on (I used a phone book)


Step 1.
Decide on what size paper you want to use. I used regular printer paper that was already printed on one side. I sent this batch through the printer so I had blank monthly calendars. After printing them, I just folded them in half. (If you are interested, I can e-mail you the excel spreadsheet that I created for this, just leave me a comment with your e-mail)


Step 2.
Cut the cardboard.
I cut the flaps off the box, then set the pages inside so I could figure out where to make the rest of the cuts. I liked the pictures and words, so I tried to make my cuts work with them. If you want a plain cover, make your cuts where every, then turn the covers over before the next step.
Some of the books I was able to use the fold as the top, sometimes I couldn't. Both ways seem to work well.
I used a rotary cutter and a straight edge to cut the boxes up. I have fallen in love with rotary cutters. I have one for paper and one for fabric :) Scissors will work also, you will probably have to actually measure.


Step 3.
Making Holes
Once you have the cardboard cut to the correct size, insert the pages and make sure everything is lined up.
I used the phone book to keep my pages and covers lined up. It also made for a nice drilling block... after I adjusted the drill bit... I only ended up with one small hole in the floor :)
I used the edge of the picture on the back of the phone book as my guide, you may want to draw a line so your holes are straight.

If you don't have or don't want to use a drill, you can also use a hole punch. Punch the top cover, add and line up the first page (or however many you can punch through at onece), punch through the first set of holes, and continue until you have punched all of your paper and the back cover.

Step 4.
Stitching
This is where I got the (lame) name of stitched books. I used embroidery floss (because I have a ton of it on hand). I used a blanket stitch (I had to google it the other day for a different project). It is important to make sure you don't stitch them to tight, otherwise your book won't really open.


That is it. Here are a few pictures of the ones that I made today.


This last one I even managed to include a recipe on the back (ok, it was totally by accident, but still cool).


I would love to see what you make! If you feel like sharing, go to my FB fan page
and share away :)

Saturday, March 20, 2010

Coming Soon...

to a KaoticKrafter Shop near you! (Well, I guess not physically near you)
*Make sure you read all the way to the bottom, I have stuff to give away*


My friend, Mary, and I make a great team. I make recycled paper, she has a zutter. What is a zutter? It is a nifty little contraption that allows you to bind, well, anything.

When I had started making homemade paper a few months ago, I brought some up to my mother-in-law, Karen, (or Gramma) so I could show off my new skill.

Gramma was impressed (she really is to good to me). I decided to show the paper to her friend, Mary. Mary makes awesome cards, so I thought it might be nice to have her input.

Mary liked it and had some great ideas. We ended up brainstorming for a while about all the possibilities. We decided to make some journals. We would use my paper (which is almost as thick as cardboard), for the covers, then Mary would add the insides and bind it all.

The books pictured above are some of the first ones we made. Actually, I gave the paper to Mary, she did everything else.

We both enjoyed making the first batch of books. Yesterday I made some more paper to give to Mary.
Paper in the process of being made
Paper Drying
My homemade drying setup :)

Mary and I are very excited about the colors for this next batch of books :) We hope to offer them in my ArtFire shop soon, but we have some things to figure out first.

Here is where the giveaway comes into play.

We need your help and as a thank you, we are giving away the pink book and the purple heart book.

To enter the giveaway, we need your thoughts on the following two things:

How to finish the books- A few of the ways we are thinking of finishing the insides of the books are:
Blank
Lined
Date Book
Address Book
Birthday/ Anniversary Reminder Book
Photo Albums

What to use for the inside paper- The three shown above have card stock paper in them. We want to make them more recycled, so some other thoughts we had were:
junk mail
used packaging paper
paper printed on one side

Oh, and one other thing we could use your thoughts on. If we offered them fully customizable (you pick the covers, you pick the insides, you pick the finish), would you like that option?

If all goes well, we hope to be ready to sell these by mid April. To meet that deadline, the deadline for this giveaway is going to be April 3rd at midnight. I will let you know on the 4th who the winner is.

So, for your comment to count, I need three things from you.
1. What finishing would you find most useful?
2. What type of material would you like to see inside?
3. Would you be interested in completely customizing your book?

Oh, and make sure I have some way to contact you if you win!

We are totally excited to start making these, and can't wait to hear what you think. Thanks in advance!