I should really be doing groceries, but I would much rather be doing crafty related things :)
My crafty related thing I decided to do was create a tutorial so others can make felt flowers like I do (you know, if anyone wants to).
Oh, and I am still getting use to this whole tutorial thing, so if you find any problems, let me know.
Lets get started.
Supplies

Felted wool sweaters
Scissors
Marker (or other fabric marking device)
Circle pattern (the diameter of your circle will aprox. equal your flower diameter)
Sewing Needle
Thread
Choice of backing (pin, hair clip, headband, etc)
Hot Glue Gun (not necessary, but helpful)

Step 1. I like to make a 4 inch flower. They are a good size for pins, to go on bags, or for headbands (if you like bigger flowers on your head). Anyway,

Trace circles on your sweater. If your sweater is thicker, you will need 3 circles. For thinner felted sweaters, you will need 4 or more.
Also, if you are making bigger flowers (bigger then 4"), you may need more circles regardless of the thickness.


Step 2. Cut all of your circles in half.
If you have stripes on your fabric, fold your circle in half then skip ahead a few steps to figure out which way you want to cut your fabric. I like to cut across the stripes.

If you cut out more then one set of circles, I suggest putting the correct number of 1/2 circles into individual bags. They make a great project to do on the couch or while waiting at the doctors, etc.

3. Thread about 2 to 2.5 yards of thread onto your needle. Knot the end.

4. Take one 1/2 circle and fold it in half.

Like this.

Then fold one half, in half again, like the picture above.


This is what the front will look like.

This is what the back looks like.

Fold the other half in half, this is what the back of your flower will look like.
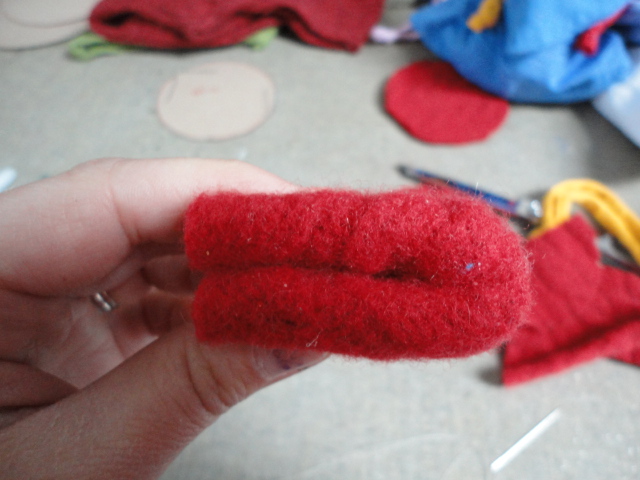
And the front.

Step 5. Take your threaded needle and thread the petal right through the bottom center.

Repeat until you have 6 petals on your thread. Be sure that when you thread each petal, the petal is facing the same direction as the others.

Step 6. Once you have all six petals threaded,

poke your needle through the spot where you originally inserted your needle. Instead of going straight through, insert your needle at an angle.

Step 7. Go around the flower threading your needle through the base of the petals. Once you get back to the beginning,

go through the first petal you started with. Pull the thread tight. Poke the needle from the front to the back.

This is what the front of your flower should look like.

From the side.

Step 8. Repeat step 7 on the back.

This is what the back will look like.

From the side after tightening both front and back.

Step 9. To create the center, use fabric scraps from the same sweater or a different one. Cut a rectangle.

Like this.

Step 10. Roll up the rectangle fabric.
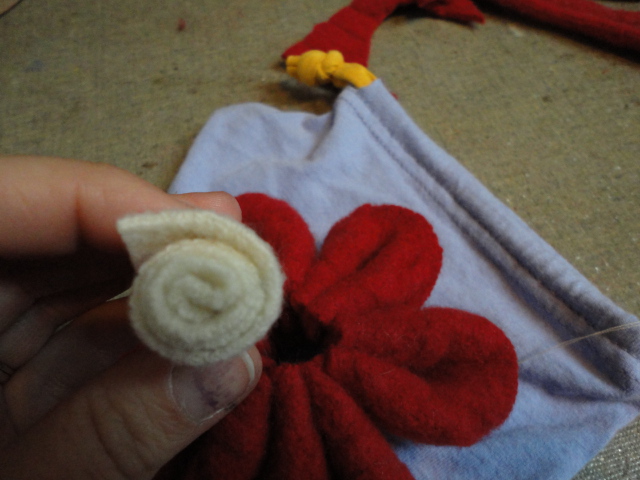
This is what you want it to look like.
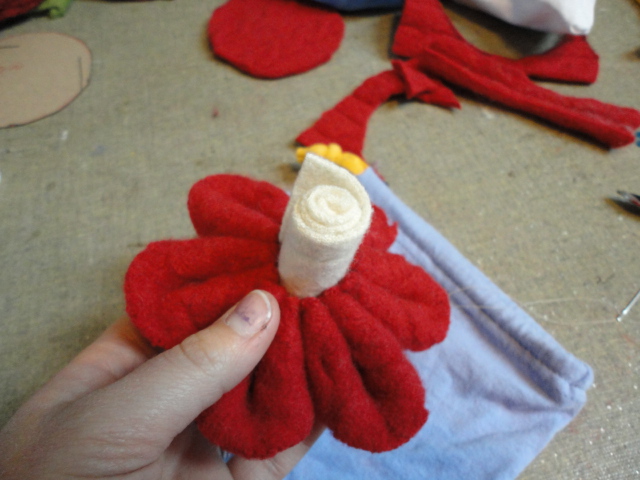
Step 11. Poke the rolled felt into the center of the flower. Twist it so that you are twisting it in the same direction that you rolled it.

This is what it will look like once you have it where you want it. If it sticks out the back also, that is ok. You can trim it after you have finished sewing it.

Step 12. Poke your needle back through to the front, but coming out one of the bottoms of the petal.

poke the needle through the center of the flower, and out through the base of another petal. Keep going back and forth until you have passed the needle through base of each petal.

This is what the front of your flower should look like.

Step 13. Repeat step 12 on the back.

Step 14. Trim the center of the flower in the back. Try to get it even with the petals, but make sure you don't clip any of the thread.

Step 15. Cut a square of scrap fabric from the same sweater as the flower. Hot glue the scarp of fabric onto the center back of the flower.

like this. Trim the extra edges.

If you want your flower to be a pin, lay a strip of hot glue and firmly press the pin onto the glue.

You want the glue to be poking through the holes, like so.

If you don't have the actual pin things, a safety pin will do just fine. Just glue the pin under a strip of scrap fabric.

Same if you would like a flower headband.
I apparently forgot to take some finished photos. Oops.
Oh well, I hope that you don't have any problems understanding this tutorial.
If you do have problems or questions or comments, just let me know!
Have a great day!


