Showing posts with label kaotickrafter. Show all posts

Saturday, February 1, 2014

Nail and String Art

I realize that these nail and string art (or whatever they are called) have been around for a while, but we finally decided to give it a try.

Super simple. All you need are some nails, some wood (we used scraps that I had painted forever ago) and some sort of string. We used embroidery floss, but yarn or even thread I think would work for this.

Place a piece of paper over your wood. Draw the desired shape 
(or use your computer and printer if you want a more precise shape)

Hammer in some nails along the lines your drew

Pick a nail to start with, tie your string to the nail, then loop randomly (or in a pattern).
I had Emma go around each nail in a complete circle before moving on to then next nail.

Enjoy your masterpieces! 

We hope the winter is treating everyone well!

Thursday, February 21, 2013

Latest Obsession- Felted Mini Horses

I have been enjoying making these lovely little ponies. I am finally getting the hang of making them, so a tutorial will be coming soon.

Anyway, here are the little equines that I have made so far. They are for sale, so if your interested, send me an e-mail at kaotickrafter@hotmail.com.

*all names are courtesy of my 7 year old daughter*

All mini horses are about 1/4 of a hand high (if your not a giant dork like me, that's 1" measured to the back, about 2" from hoof to ear tip) and about 2 1/4" long. Some of the horses are made from recycled wool sweaters, others are made from a mix of wool/rayon felt. When possible, I stuff these little guys (and girls) with wool roving. Others are stuffed with poly-fill. I hope to find a source of local wool roving, but until then, I'll be using the poly-fill.

Mini Felt Horses (7)
Witchcraft 

Mini Felt Horses (9)
Coco Swirl

Mini Felt Horses (11)
Carrot Swirl

Mini Felt Horses (5)
Mints

Mini Felt Horses (20)
The Roundup (photo by Emma)

I can also custom make them in just about any color, so let me know if you want one (or an entire herd!). To see the color selection I am working with, check this out

Have a great day!

Monday, February 4, 2013

Altered Tags

I have been doing a lot of sketching in my altered journal lately, which means of course I've been doing my altering elsewhere.

Altered Tags- Dream, live, love- KaoticKrafter (2)
Altered Tags -Dream, Live, Love- KaoticKrafter

Altered Tag- Be Yourself- KaoticKrafter (4)
Altered Tag -Be Yourself- KaoticKrafter

What have you created lately?

Saturday, January 19, 2013

Kitchen Menu Board- Tutorial

So, for those that may have read my post where I complained wrote about meal planning, here is the tutorial for how I made my menu board.

Kitchen Menu Board by KaoticKrafter (12)
Kitchen Menu Board by KaoticKrafter

Materials needed:
Cardboard (mine is about 30"x17")
Glue (we just used Elmer's cause it's what we had)
Paper (old book pages, wrapping paper- think recycling bin stuff)
Paint (acrylic craft paint, wall paint, etc.)
Longer sewing pins
Packing tape

Tools needed:
Cutting tool (scissors, knife, etc.)
Measuring tool (ruler, tape measure, etc.)
Sharpie
Old gift card
Needle nose pliers

Process:

Kitchen Menu Board-meals-by KaoticKrafter (2)
Step 1- Decide how large you want your tags to be. Mine are about 2"x4". I wanted them big for a few reasons- easier to see, easier for me to write on, I already had a template for the tags. Cut out and hole punch a bunch (I think I started with 30+)

Step 2- Once you know how big your tags will be, figure out the size of your board. I decided I wanted 5 "meals" per day (Breakfast, Lunch, Supper, Side 1, Side 2 -or- Supper, Side 1, Side 2, Snack, Condiment/staple, etc.) My board ended being about 30" tall by 17" wide. Each meal/side is 2.5"x4" with the space for the day of the week about 4"x4.5".

Menu Board (2)
Step 3- Measure and cut your cardboard.

Menu Board (4)
Step 4- Glue a couple of layers of paper over your cardboard. We used old book pages from novels and a dictionary. To spread the glue, we used old gift cards.
You might want to allow the glue to dry before continuing. (We didn't cause we are impatient like that)

Menu Board (6)
Step 5- Add a layer of paint, using the old gift card (or a paint brush) to spread the paint. If you are happy, let it all dry.

If your like me, you can add a few more layers

Menu Board (7)
I added a layer of pages from an old cookbook, then did a thin coat of blue over it all. I wasn't super excited about it, so I added a coat of green (wall paint sample) over it all.

Menu Board

After that I was happy with it. I let it dry for 2 days ('cause we were busy and couldn't work on it). 

Step 6- I had pages hanging over the edges. I decided to curve them over the edges and tape them on the back. Feel free to trim the pages, or use ribbon to make a pretty boarder. You could probably even put it in a picture frame if you wanted. 

Kitchen Menu Board by KaoticKrafter (3)
Step 7- Measure and draw your "grid". Start with a pencil then go over it with a sharpie- or if your really brave, just go at it with the sharpie. 

Step 8- Using your tags, draw a circle in each spot so you know where to stick the pins. (see picture for step 6) 

Kitchen Menu Board by KaoticKrafter (4)
Step 9- Working one row at a time, stick a pin (the longer ones work better) through the center of the circle, leaving enough of the pin sticking out so that you can hang a tag on it. When you get to the end of the row, carefully flip the board over. (Watch out for the pins!) 

Kitchen Menu Board by KaoticKrafter (6)
Step 10- Starting closer to you and working away, use your pliers to grab the pin right next to the cardboard. (Not the best picture- I had already pulled the pin through when the kiddo snapped the photo)

Kitchen Menu Board by KaoticKrafter (7)
Step 11-Pull the pin all the way through, then bend the pin slightly where the pliers are. 

Kitchen Menu Board by KaoticKrafter (8)
Step 12- Push the pin back "out." You want the pin to be as flush with the back side of the cardboard as possible. 

Kitchen Menu Board by KaoticKrafter (9)
Step 13- Once you get to the end of the row, take a strip of tape and cover the pins. Use your finger to carefully smooth the tape over the pins. 

Continue steps 9-13 till all of your rows are done. 

Kitchen Menu Board by KaoticKrafter (13)
Label your days and name your columns however you wish! I have a feeling I will be changing them up here and there, so I just made column labels out of scrap paper and used double sided tape to secure them. I like to make some of our staples/condiments (think chicken stock, mayo and ketchup) as well as snacks/treats, so I think that's what the extra 2 columns will be for. Who knows, maybe I'll go crazy and actually plan breakfasts and lunches as well!

For my tags- I write the meal or side on the front, then the recipe location (cookbook, website, etc) on the back as well as the ingredient list.

Kitchen Menu Board-meals-by KaoticKrafter

 My hope is that this will streamline the meal planning/grocery list process.

Anyway, figure out the best where/how to hang your new menu board, and enjoy!

Kitchen Menu Board by KaoticKrafter

p.s. I have created a few tags with our tried and true favorites, but I plan to create the rest of the tags as we try new foods so that I don't waste time creating tags only to find out that no one likes the item on it. 


Saturday, January 12, 2013

It's What You See

I am undecided at this point, as to whether audio books are a good thing or not. I find that when we are listening to them while crafting, we have a tendency to miss meals.

But, we get a lot of crafting done!

January 2013 Art Journal -See- By KaoticKrafter (2)
See

January 2013 Art Journal -See- By KaoticKrafter (3)

January 2013 Art Journal -See- By KaoticKrafter

January 2013 Art Journal -Backgrounds- By KaoticKrafter (2)
Doily Background

January 2013 Art Journal -Backgrounds- By KaoticKrafter
Layers!

We did finally stop for a snack, but we really want to get back to our "39 Clues". 

Thursday, January 10, 2013

A Few New Pages

Now that I have a craft table...

How about we start there. Since moving here, my crafty mojo has been a bit off. I blame it on the fact that I didn't have a table to craft at.

For a while this is what I had to work with (and this is after moving it around a time or two).
Craft Room Makeover Jan '13 (2)

The table was really low and I had to sit on Emma's step stool to work at the table. Not so cozy. 

I had thoughts that a round table would be nice, but I was too cheap to buy one. Even a used one. So, I looked around and decided I could make one using most of what I already had. So, a quick trip to home depot, about $5 in lumber and hardware later, and I have this:

Craft Room Makeover Jan '13 (12)

Now, I can get my craft on. 

I made this journal from cardboard and pages from old books. I like to glue the old pages together to make them stronger, then paint over them. 

Anyway, here are some photos. 

Cover
Jan13 Altered Journal -Cover- By KaoticKrafter

Blank Pages
Jan13 Altered Journal -Blank Pages- By KaoticKrafter (2)
A mishmash of pages from all the books I have altered- dictionary, old novels, the kiddo's completed work books, etc. 

First Pages- To Do-
Jan13 Altered Journal -To do- By KaoticKrafter (3)

 -Be-
Jan13 Altered Journal -Be- By KaoticKrafter (4)

A Story
Jan13 Altered Journal -A Story- By KaoticKrafter (6)

It feels so good to be creating again. I think it might become a daily habit. 

Monday, September 17, 2012

August 2012 Altered Journal - Pt. 2

In case you missed part 1, you can find it here.

We ended the last post on August 16th, so here we go with August 17th!

August 17th
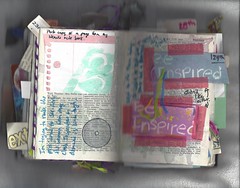
Not a really great scan, or page for that matter. I had a cool idea that I sketched out on a post-it note and stuck that into my journal. 

August 18th
Random bits of paper added to the journal. 

August 19th
I wasn't sure what to do, so I grabbed one of my sets of markers and made a sample sheet of what they would look like. Practical and pretty.

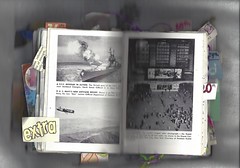
This was one of the pictures from the actual book. I kept it because I thought it was pretty cool. The picture on the right is a photo of "the worlds largest photo- the Kodak Colorama, 18 feet high by 60 feet wide- as shown in the Grand Central Terminal, New York City, New York." This is from 1950.

August 20th
A fun, simple page that I did while in a hotel room. The photo of the flowers was taken by Emma.

August 21st
I started not feeling well on our trip back home. I was in bed by 7:30pm and never even thought about working in my journal until the next day. 

August 22nd
This was another class night, but I only had one person attend. I demonstrated how to stitch around the edges of the page, and I made a fun little tag. 

August 22nd
Once home from my class, I played around with Crayola Studio on the computer and made the heart. 

August 23rd
The "Awesome" was some leftovers from a wood block I made. The block had a paper boy on it with the quote, "Don't forget to be awesome."

August 24th
I had sort of been commissioned to make an altered journal, which I was struggling with. I glued in a few bits that I had made for the journal that I ended up not liking. A reminder that creativity isn't always there when I want it. Best to use it while I can!

August 25th
I don't remember why, but I decided to make Emma a dress from a t-shirt that was a bit to snug for me. In order to guarantee that she would wear it, I sewed a horse on it. I know, pretty sneaky. This journal entry is some of the left over fabric I used to make the dress. 
Oh, Emma LOVES the dress :0)

August 26th
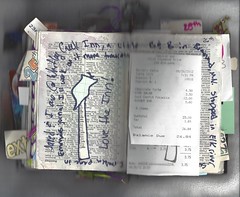
Jared and I decided last minute (with some encouragement from Gramma) to go on a little trip, just the two of us. So we did. This journal entry is some receipts from some of the places we stopped on our trip up, as well as a little snippet of the page I created in the journal I am working on for Emma. 

August 27th
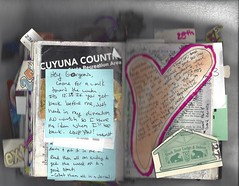
I spent the entire day being creative at the beautiful Whiteley Creek B&B while Jared was out mountain biking. Here are a few of the leftovers as well as some notes and receipts from the day. 

August 28th
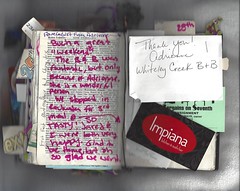
Our last day on our mini vacation. More receipts and lots of writing!

August 29th
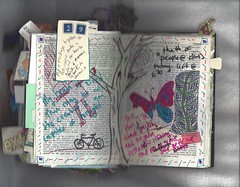
Just some random doodles and whatnot's. I love drawing trees. 

August 30th
I jazzed up an old composition book for Emma and put some of the stray bits into my journal. Probably should actually write more stories in the composition journal for her to illustrate...

August 31st
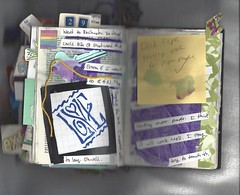
More random bits. The "LOVE" is a piece of graph paper stamped a while ago that was just living in my stash. A random paper key, also from my stash, and a little watercolor sticker. The post-it note was written just before bed one night and included into my journal because I actually remember to do what I had written down. 

Well, that is the end of the book. I had a few pages left in my journal, so I just wrote what my overall impression of the past month was as well as a few things that happened throughout the month that I wanted to remember (like Emma finally realizing that she can read-and reading everything in site). 

I am currently working on Septembers altered journal, which has been a little tougher for some reason. I will start scanning pages and start posting them soon. 

Well, I hope that you enjoyed seeing my daily journal entries, and I hope that this inspires you to give it a try.

Have a creative day!